Friday 18 February 2011

{ Snow White Photo shoot }


I am so excited to share with you, this fun and innovative photo shoot that I was very luck to be a part of. Location was in Queenswood Highgate.
Annabel Beeforth, of  Love my Dress.net has kindly featured this shoot in her very popular wedding blog.
I had the pleasure of working with some very talented stylists and designers who were all amazing in their field of work. You can check out all these wonderful people at the end of this post.

Mariam's wonderful air brushing technique done on Annie (Snow White)


Make up for the shoot
Severin Working his magic on Olivia ( our Evil Queen)

While Miriam and Severin were working on the models, the rest of us                were indulging on Dana's croissants and tea.

Tiffany lapping up some kitty love from Oliver, Dana's cat


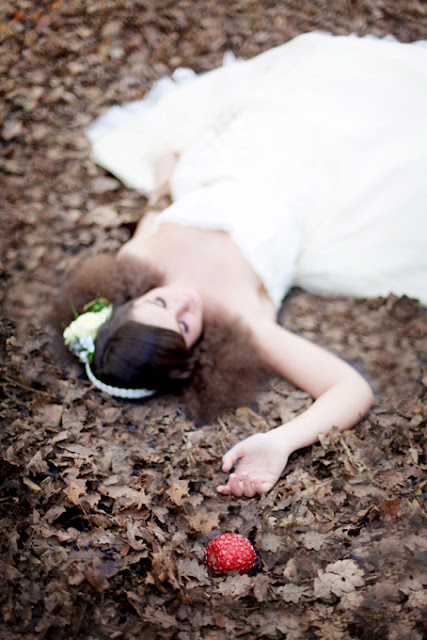
Introducing Snow White
Dress supplied by Dana Bolton

It was a joy to watch everybody work together, we all made a great team. I was fully focused on making sure my cake, cupcake bouquet and cake pops were looking perfect on the dessert table. Slowly everything came together.

Dessert table
Cupcake bouquet

Cake Pops


A very pretty Evil Queen
Flowers by Wild About


I loved how Alex gave direction to Annie and Olivia, it was clear to me that she had a vision in her mind and she executed it perfectly as each and every photo tells a tale. The atmosphere was relaxed, and everyone was enjoying themselves.

Me finishing my cake
Tiffany and I working on the dessert table
Taa daa!

Striking a pose!
Left to Right: Severin, Tiffany, Dana, Annie, Olivia, Alex, Miriam, and Me
And that's a wrap ! :)


I would like to thank Tiffany for giving me the opportunity to be a part of this amazing shoot and meeting some wonderful people! Severin, Dana, Annie, Olivia, Alex and Miriam, you guys are awesome and I hope to work with you all very soon!


Photography: Alex Beadon
Styling: Tiffany-Grant Riley
Cake designer: Samia Mazhar
Wardrobe stylist: Dana Bolton
Hair: Severin Hubert
Make up: Miriam Jensen
Florist: Wild about
Models : Annie Patterson and Olivia Biancardi

Wednesday 9 February 2011

{ Mark Columbus Photography }


It gives me a great deal of pleasure to introduce a very talented contemporary wedding photographer who's eye catching images just takes your breath away !
He goes by the name of Mark Colombus and I will let him tell you more about himself.


" I'm a London based contemporary wedding photojournalist. I cover all of London and the South East, i keep it nice and simple and take the hassle and stress out of choosing a photographer.
Wedding Photojournalism is the way of photographing a wedding in a hand off manner, being unobtrusive and capturing the day, creatively as your day unfolds. " 


"I promise to provide excellent professional wedding photography as well as a competitive package.

I approach each wedding as a unique event full of precious memories. Special moments and intimate details are captured in a tender glance, laughter at speech time, or a stolen kiss."


"Here is a couple of things about me that you might want to know:


* I'm a Kiwi (the country, not the fruit)

* I've been living it up in the UK for the past 8 years.

* Since arriving in the UK, travel and tourism has been my day job

* I have always had a passion for photography, shooting anything and everything for fun

* I started a part-time photography business in 2008, as well as shooting my 1st wedding in the same year and I have never looked back. I have been getting busier and busier every year

* I'm married to beautiful pommy bird (Katie) and have a little daughter (Kaila-Rose) who is as hyperactive as I am. Chasing after her all day certainly helps keep off the lbs!! Yay, more pies for me!

* My friends describe me as chilled out yet full of energy (certainly helps when shooting 13hour weddings)

* My wife calls me Extreme Kiwi, I think due to the fact that I throw myself into 
anything I do (and absolutely nothing to do with the fact that I used to scale buildings on a regular basis)


* I love life and love what I do. I always feel lucky to be a wedding photographer and to be part of a couple's very special day

* My style of wedding photography is fairly fluid as it is a wedding not a photoshoot. I do very little instructing or arranging of shots throughout the day. It is photography reportage with a quirky edge."


"I document the day as it happens with beautiful, timeless, creative images. As well as capturing these pictures and memories, I try to keep things as fun and relaxed as possible as I know how you'll be feeling on the big day."


I would like to say a BIG THANK YOU to Mark for sending me his beautiful pictures and making my blog look truly inspiring! 
If you like what you see and can't wait to contact him, here are his details :

Website - 
http://www.markcolombus.com
Facebook - 
http://www.facebook.com/MarkColombusPhoto

Twitter - 
@MarkColombPhoto

Tuesday 28 September 2010

{ Perfect Wedding magazine - October Issue }

The magazine cover which featured my cakes

Woke up to the sound of the postman shoving the mail through our front door ,when I came across quite a heavy envelope addressed to me... Initially I was puzzled as I wasn't expecting a package. Once opened, I was looking at the October Issue of the Perfect Wedding magazine with a note from the lovely Sarah Murray (Advertising Manager for the magazine) reading "Hi Samia posting you the latest edition of the magazine with editorial notes on your cake". 
A huge smile beamed across my face and luckily my hubby was working from home that day as well. I ran to his office and then I opened the page Sarah had marked for me and there was my cake which was the Editor's choice!! I was overjoyed, once again screaming like a lunatic!! :)
Editor's choice
 After a nice cuppa tea, I was casually browsing through the magazine and to my surprise, on page 43, my Rock n' Roll cake was staring at me. I was so happy, just beaming inside because this is the moment where all the hard work, late nights and time away from hubby and family paid off. It wasn't all for nothing...:)


Rock Chic cake

Monday 23 August 2010

{ Fresh flowers between tiers - Tutorial of my Sweet Elegance cake }

Hi everyone,
Well last weekend I had to put together a 3 tier wedding cake with flowers in between the tiers and a flower topper on top of the cake. I researched and tried to find a simple solution to have a stable construction which meant the cake would not topple off or look topsy turvy. 
I couldn't find anything!! So I decided that as I was constructing my cake I would take step by step  pics and upload it on my blog so that other decorators would not be stuck like I was!
So here it goes!


STEP 1


First of all you need your flowers and cake tiers.

STEP 2

Oasis floral foam to secure the flowers


Plastic tray


I started with the cake topper and cut the foam in a cylindrical shape and soaked it in water. I then got a little piece of Cling film and wrapped in on the bottom and then tied it with an elastic band (to keep the foam water proof and protect the cake. I then placed the foam on top of the tray stuck with double sided sticky tape. The foam is now ready for flower arranging.


Cake topper

The topper is now complete.

STEP 3

Oasis once again but this time I am arranging only the sides of this foam and this foam will be positioned on top of the bottom cake tier. I grabbed a round template of appropriate size and made a mark on the foam to cut around.

Now the foam is just like my template and is also soaked in water. I repeated Step 2 regarding the plastic tray and cling film and now this foam is ready to decorate!.


Once I had finished decorating I went into a blind panic, because I decorated the flowers too high! This would mean that when I put the middle cake tier on top of it, the flowers would get squashed. 


I found the perfect solution. I cut the polystyrene template (from the above picture) approximately 1 cm in height and stuck it on top of the foam. If you look closely at this image, you will see 4 wooden dowels that have been cut exactly the same height as the top of the foam/polystyrene.

STEP 4

Now comes the most important part... Doweling!. 

My hubby helping me with the dowels


The first thing you must do is position the flower so that it is on the middle of the cake.
Then, as my husband demonstrates, a long dowel is placed right next to the foam and pushed all the way down until the dowel hits the bottom board of the cake. Then the dowel is cut in line with the top of the foam/polystyrene. This step is repeated 4 times across the foam.

STEP 5

Repeat step 3 and 4 for the foam which goes on top of the middle tier and directly underneath the top tier.
Once that is complete all you have to do is stick the tiers together with royal Icing. What I did when I got to the venue is start bottom up. With the bottom tier I put a thick layer of Royal icing onto of the flower foam/polystyrene. I then positioned the middle tier on top of it, then I put Royal Icing on top of the Flower foam/polystyrene of the middle tier and positioned the top cake tier on top of it, then stuck on the cake topper.

Here is the image of the final cake. 


I hope this has helped you in some way, it may not be the best technique, but it's the one which worked for me:) xxx.